
Remodeling guide
Three Day Temporary Kitchen Plan: Checklist and Pro Sequencing
Pick one room with electrical outlets and a workable path to water, then build around it. A functional temporary kitchen during a remodel needs a microwave, a toaster oven or air fryer, a slow cooker or Instant Pot, a mini-fridge, and a folding table for prep. Set everything up a few days before demolition, and solve dishwashing first, because that’s the problem people underestimate until they’re stuck with a sink full of dirty pots and nowhere to put them.
TL;DR:
- Most households should prioritize using the laundry or utility sink for dishwashing due to its water handling capacity and ease of use.
- Position the temporary kitchen in a room with sufficient power outlets on dedicated circuits, nearby water access, and space to contain construction dust.
- Batch-cook meals and stock a mini-fridge or cooler before demolition to minimize reliance on takeout, especially when refrigerator space is limited.
- Separate appliances onto different outlets to prevent tripping breakers, and run a HEPA filter during demolition to contain dust and improve indoor air quality.
- Allocate at least three days before demolition to set up your temporary kitchen with essentials, confirm all electrical and water connections, and create a clear trash and cleaning system.
Table of Contents
- Where to Locate Your Temporary Kitchen
- Which Appliances Do You Actually Need?
- Where Do You Wash Dishes Without a Kitchen Sink?
- How Should You Lay Out a Tight Temporary Kitchen?
- What Should You Cook and Store With Limited Fridge Space?
- What Electrical and Safety Steps Come Before Demo Day?
- Your Setup Checklist Before Demo Day
- Real Setups That Worked (and What They’d Change)
- How Do You Handle Trash and Cleanup in a Temporary Kitchen?
- What Does a Temporary Kitchen Cost to Set Up?
- How Long Will You Be Without a Real Kitchen?
- A Few Habits That Actually Save Your Sanity
- How Solution Team Remodeling Reduces Kitchen Downtime
- Sources
- FAQ
Where to Locate Your Temporary Kitchen
The room you choose determines almost everything else, so it’s worth thirty minutes of honest evaluation before you move a single appliance. Walk each candidate space and check four things: how many outlets are available and on which circuits, whether there’s a sink or drain within reach, whether you can seal the space from construction dust, and whether the floor can survive grease spills and dropped pans.
- Power check: count outlets and note if they share a circuit with anything else that pulls heavy amperage.
- Water access: a utility sink beats no sink; a bathroom sink beats a five-gallon bucket run.
- Containment: can you hang plastic sheeting or a zippered door across the entry?
- Floor protection: rugs, mats, or cardboard under the cook zone save your flooring from grease and heat.
Dining room. This is the default choice for most families, and for good reason. It’s usually near the kitchen, has decent outlet coverage, and keeps meals close to where you’d normally eat them. The tradeoff is furniture and flooring protection. Lay down a vinyl runner or moving blankets under your cook station.
Laundry room. Often the best-kept secret for a temporary setup. A utility sink solves your dishwashing problem instantly, and laundry room floors are built to handle water and mess. Check your breaker panel first. Older laundry circuits sometimes can’t handle a microwave and an air fryer running at once.
Basement or garage. Great for dust containment because the space is already separated from living areas, but concrete floors get cold fast and lighting is often poor. Run a space heater and a few clamp lights before you commit.
Spare bedroom. Workable only if you protect the carpet completely and crack a window or run a fan. Grease smell and steam soak into carpet fibers fast.
Outdoor or patio setup. In warmer months, a covered patio with a grill and an outdoor prep table can be surprisingly comfortable. Weather and pests are the real risks; a lidded cooler and a tarp cover handle most of it. Local news coverage on surviving a kitchen remodel consistently points to the dining room and laundry room as the two most workable indoor options for exactly these reasons.
Which Appliances Do You Actually Need?
You don’t need to replicate your kitchen. You need to cover reheating, boiling, and basic prep, and a handful of countertop appliances do that job. Recommended core appliances for a temporary setup include a microwave, a toaster oven or air fryer, an electric kettle, an Instant Pot or slow cooker, a portable induction cooktop, and a mini-fridge for anything that spoils.
- Microwave: nonnegotiable for reheating batch-cooked meals and defrosting.
- Toaster oven or air fryer: covers roasting, crisping, and reheating pizza without soggy results.
- Instant Pot or slow cooker: does the heavy lifting for soups, stews, and rice while you’re busy elsewhere.
- Portable induction cooktop: optional but useful if you want to sear or sauté anything; pair it with one good skillet.
- Electric kettle: fast hot water for coffee, tea, and instant noodles.
- Coffee maker: keep this running no matter what else gets packed away.
- Mini-fridge or cooler: separate from your main fridge so you’re not hauling milk across the house daily.
For cookware, resist the urge to bring your whole cabinet. One good skillet, one Dutch oven or large pot, a solid cutting board, and a sharp chef’s knife handle almost every meal you’ll actually cook during a remodel. Cooking without a full kitchen works best when you stop trying to replicate your normal routine and lean into simpler, one-pan meals.
Pro Tip: Plug heat-producing appliances into separate outlets whenever possible. A toaster oven and an Instant Pot running on the same circuit at the same time is a common way people trip a breaker mid-dinner.
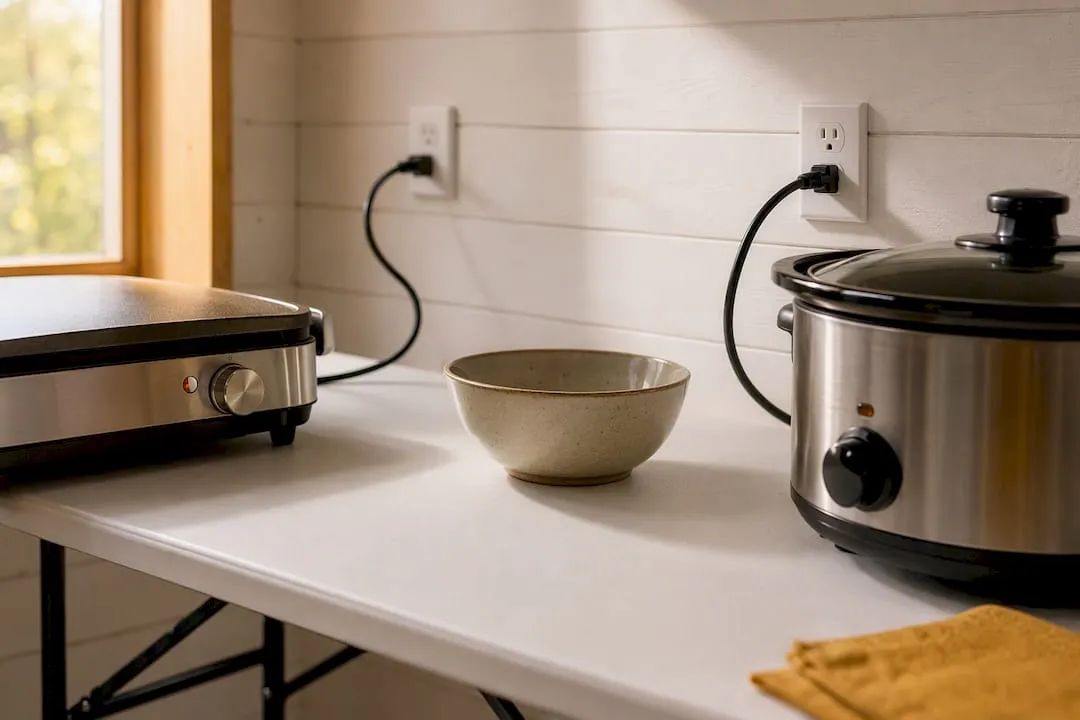
Borrow rather than buy anything you’ll only use for a few weeks, like a second slow cooker or an extra folding table. Buy the items you’ll keep using afterward, like a good skillet or an electric kettle.
Where Do You Wash Dishes Without a Kitchen Sink?
Set up a two-basin system on a sturdy folding table: one basin filled with hot soapy water for washing, a second filled with clean hot water for rinsing, and a drying rack next to it. This low-tech setup handles almost everything a normal sink would, minus the garbage disposal.
- Fill basin one with hot water and dish soap for washing.
- Fill basin two with clean hot water for rinsing off suds.
- Wash, rinse, and set dishes on a drying rack or clean towel.
- Wipe greasy pans with a paper towel before washing to keep grease out of your wash water.
- Dump wash water down a laundry or utility drain, never onto grass or outdoor soil if it contains grease or soap residue.
A laundry or utility sink is your best option if one’s available. It’s built for water and mess. A bathroom sink works in a pinch but is smaller and slower to fill. An outdoor spigot with a hose works for rinsing produce but isn’t sanitary enough for washing dishes with soap residue running off onto the ground.
Check your local wastewater guidelines before disposing of graywater outdoors. Most municipalities are fine with soapy dishwater going down an indoor drain, but dumping it on soil or near a storm drain can violate local codes.
How Should You Lay Out a Tight Temporary Kitchen?
Shrink the classic kitchen work triangle. Fridge, sink station, and cook zone should sit within a few steps of each other, because every extra trip across the room adds up over weeks of daily meals.
- One-table layout: appliances and prep share a single long table, good for small spaces like a spare bedroom.
- Two-table layout: one table for cooking appliances, a second dedicated to prep and the wash basin, better if you have the square footage.
- Vertical storage: a rolling cart or a cheap wire shelving unit holds dishes, pantry items, and cookware without eating floor space.
- Lighting: clamp lights or a work lamp matter more than people expect, especially in a garage or basement.
- Surface protection: a cutting mat and a heat-resistant trivet under hot appliances protect whatever surface you’re working on.
Practical layout templates built around this two-zone approach tend to hold up better over a multi-week remodel than a single crowded table trying to do everything at once.
What Should You Cook and Store With Limited Fridge Space?
Batch-cook and freeze meals before demolition starts, while your real kitchen is still working. Soups, chili, casseroles, and pasta sauces all reheat well in a microwave or slow cooker, and having a freezer stocked with ready meals takes enormous pressure off the first two weeks of the remodel, which are usually the roughest.
- Freeze in single portions so reheating doesn’t require defrosting a giant block.
- Rotate your mini-fridge weekly, checking expiration dates and clearing anything forgotten in the back.
- Keep a small cooler for overflow when the mini-fridge runs out of room, especially for weekend grocery runs.
- Label storage bins by category (pantry staples, snacks, breakfast items) so nobody’s digging through three bins looking for cereal.
- Stock shelf-stable staples: rice, pasta, canned beans, and pre-chopped produce cut prep time dramatically.
- Keep a short takeout list taped somewhere visible for the nights nobody has the energy to cook anything.
One-pot meals and casseroles that reheat cleanly are the difference between a stressful remodel and a manageable one. Batch cooking before demolition consistently comes up as one of the highest-value habits people wish they’d started earlier.
What Electrical and Safety Steps Come Before Demo Day?
Confirm your circuit capacity before you plug in a single appliance. Running a microwave, a toaster oven, and a space heater off the same outlet is a fast way to trip a breaker or, worse, start a fire.
- Use heavy-duty grounded extension cords, rated for the wattage of your appliances, not the thin cords meant for lamps.
- Never daisy-chain power strips; plug appliances directly into wall outlets whenever you can.
- Hang plastic sheeting with a zippered doorway between the temporary kitchen and the demo zone to cut down on dust migration.
- Tape off HVAC return vents near the work area so construction dust doesn’t circulate through the whole house.
- Run a portable HEPA filter in the kitchen zone on demo days specifically. Dust containment done right usually combines sealed plastic barriers with active filtration, not one or the other.
- Keep a Class ABC fire extinguisher within reach of your cooking appliances.
Pro Tip: Never leave a slow cooker or Instant Pot running unattended overnight in a temporary setup. The wiring and outlets weren’t designed for that space, and a few hours of supervision beats an insurance claim.
Your Setup Checklist Before Demo Day
Work backward from your demolition start date and give yourself at least three days to get the temporary kitchen fully functional.
- Three days out: choose the room, test every outlet, and confirm circuit capacity.
- Two days out: move the mini-fridge in and let it reach temperature before loading food.
- One day out: set up your wash station, folding tables, and shelving; do a trial meal to catch anything missing.
- Day of demo: seal off the kitchen with plastic sheeting, run the HEPA filter, and confirm your extinguisher is in place.
Minimal shopping list: mini-fridge, folding tables, wire shelving or a rolling cart, two dish basins, a drying rack, heavy-duty extension cords, and plastic sheeting with a zippered door. Borrow a second slow cooker or extra folding table from family if you can, since you’ll likely only need it for a few weeks.
Label bins and boxes clearly as you pack up your real kitchen. “Pots/pans,” “small appliances,” and “pantry overflow” written in marker save you from tearing through six boxes looking for a colander when the remodel wraps up.
Real Setups That Worked (and What They’d Change)
A family working with a limited laundry room setup found the utility sink solved 90% of their dishwashing headaches, but they hadn’t accounted for the narrow counter space and ended up buying a second folding table within the first week.
A garage-based setup kept dust completely out of the living space, but the family underestimated how cold concrete floors get in early spring and added a space heater and interlocking foam mats by week two.
A dining room conversion worked well for daily meals but needed a heavier-duty extension cord after the original one overheated running a toaster oven and an electric kettle together.
Professional planning changes these outcomes before they happen. Solution Team Remodeling’s approach to sequencing demolition, plumbing shutoff, and appliance hookup is built to shrink the number of days a household goes without any sink or stove access at all, and the Redmond renovation portfolio shows how that sequencing plays out on real projects, not just in theory.
How Do You Handle Trash and Cleanup in a Temporary Kitchen?
Food waste and dish water need a clear plan, or your temporary kitchen turns into the messiest room in the house within a week. Keep a lidded trash can with a fresh liner right next to your prep zone, and take it out daily rather than letting it sit near heat-producing appliances.
Wipe down counters and folding tables after every meal rather than letting grease build up, since a quick wipe takes thirty seconds and a caked-on mess takes twenty minutes. Keep a roll of paper towels and a spray bottle of all-purpose cleaner within arm’s reach at all times.
Dump graywater from your wash basins down an indoor drain, laundry sink, or utility sink rather than outside, particularly if it contains grease or soap. Grease that goes down a drain still needs to be wiped from pans first with a paper towel, since pouring grease directly into any drain, temporary or permanent, causes clogs over time.
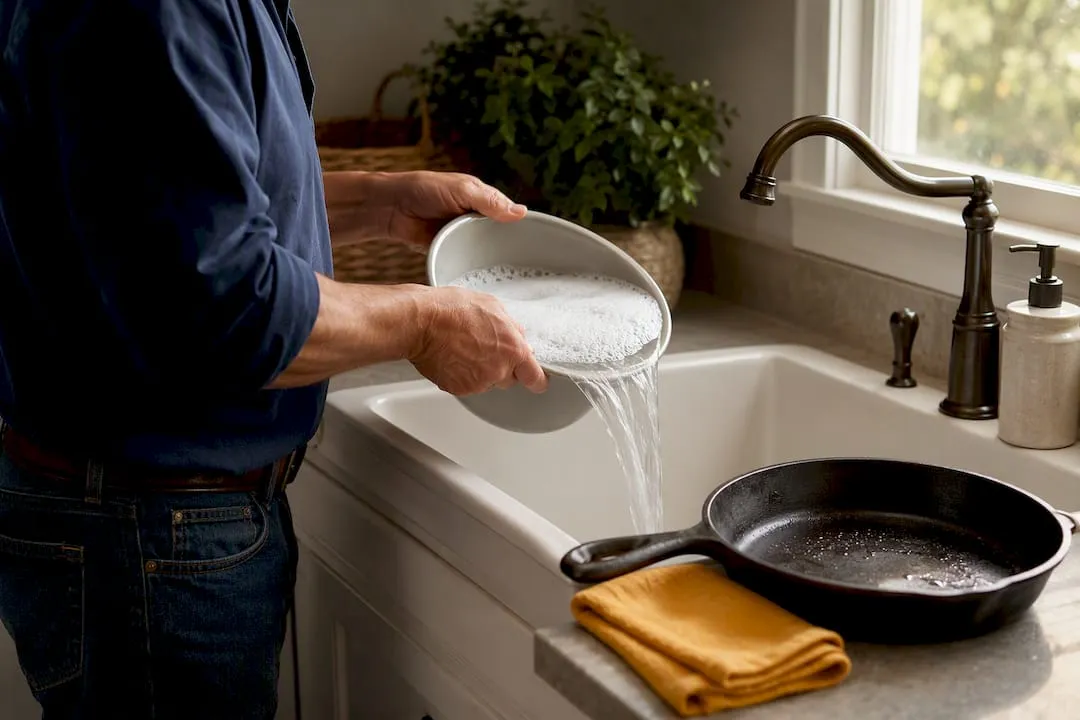
Recycling and food scraps deserve their own labeled containers separate from general trash, especially if your temporary kitchen is farther from your usual collection point. A five-minute end-of-day reset, wiping surfaces, emptying the trash, and running a quick rinse on your basins, keeps the whole setup from sliding into chaos by week three.
What Does a Temporary Kitchen Cost to Set Up?
Budget somewhere in the range of a few hundred dollars if you’re starting from nothing, less if you already own a microwave or slow cooker and just need to fill gaps. The big-ticket items are a mini-fridge and a portable induction cooktop; everything else, folding tables, basins, shelving, extension cords, tends to run cheap.
Renting or borrowing cuts costs significantly. A mini-fridge borrowed from a college-age relative or a slow cooker borrowed from a neighbor removes two of the pricier line items entirely. Buy only what you’ll keep using after the remodel wraps, like a good electric kettle or a sturdy skillet.
Factor in the hidden cost of takeout. Families who don’t batch-cook ahead of time often spend far more on delivery and restaurant meals over a multi-week remodel than they would have spent stocking a temporary kitchen properly from day one. A stocked mini-fridge and a slow cooker running overnight cost pennies compared to a week of nightly delivery orders.
If your remodel includes a full kitchen gut, ask your contractor whether utilities will be shut off for extended stretches. That answer shapes your budget more than any appliance purchase, since a longer no-water window might mean renting a portable water heater or budgeting for more bottled water and paper plates than you initially planned.
How Long Will You Be Without a Real Kitchen?
Most kitchen remodels run somewhere between four and eight weeks from demolition to final appliance hookup, though plumbing and electrical delays can stretch that timeline. Ask your contractor for three specific dates: demo start, plumbing shutoff, and final appliance hookup. Those three markers tell you far more than a vague “six to eight weeks” estimate.
Contractors who sequence plumbing and appliance work carefully can shrink the number of days you’re completely without a sink or stove, sometimes by more than a week compared to a poorly sequenced project. That’s the kind of detail worth asking about directly when you’re choosing a remodeling team, since the gap between a well-planned schedule and a chaotic one shows up directly in how livable your temporary kitchen setup feels.
For projects expected to run longer than eight to twelve weeks, it’s worth seriously weighing a short-term furnished rental or an extended-stay option. Living through an extended remodel research suggests that beyond that window, temporary housing often costs less overall than months of takeout and disrupted routines, and it protects your household’s patience in ways a mini-fridge can’t.
A Few Habits That Actually Save Your Sanity
The small stuff matters more than people expect. Keep your coffee station completely outside the demo zone, on a shelf, a cart, anywhere dust can’t reach it, because a working coffee maker on a bad morning does more for morale than any appliance on this list.
Decide early whether your household is staying put or relocating temporarily, and tell your crew that decision directly. It changes how they sequence work around your family’s schedule. Track three dates religiously: demo start, plumbing shutoff, and final appliance hookup. Those three markers tell you more about how the next few weeks will feel than any general timeline estimate ever will.
— Vlad
How Solution Team Remodeling Reduces Kitchen Downtime
Solution Team Remodeling is the alternative to guessing your way through a remodel with a mismatched extension cord and a leaky basin. The real advantage isn’t the appliances you buy, it’s how the demolition, plumbing shutoff, and appliance hookup get sequenced. Careful scheduling shrinks the number of days you’re stuck without any sink or stove, and clear containment practices, sealed plastic barriers, taped-off HVAC returns, keep dust out of the rest of your home while the work happens.

Transparent scheduling and honest pricing mean you know your three critical dates well before demo day, not the week of. If you’re planning a kitchen or bathroom remodel in Redmond or the surrounding area, request a consultation and take a look at the Redmond renovation portfolio to see how a well-sequenced project actually runs from start to finish.
Sources
- How to Set Up a Temporary Kitchen During Remodel – BobVila
- How To Set Up A Temporary Kitchen During Remodel – The JimboSlice Workshop
- Temporary kitchen setup during remodeling: Rohrer for Construction
- Cooking without a kitchen — Bon Appétit
- 8 tips for surviving a remodel with a temporary kitchen — Seattle Times
FAQ
How Do You Set Up a Temporary Kitchen During a Remodel?
Choose a room with reliable power and, ideally, a sink nearby, like a dining room, laundry room, or basement. Move in a mini-fridge, microwave, and slow cooker a few days before demolition, and build a two-basin wash station for dishes if your main sink will be offline.
What Is the 30% Rule in Remodeling?
The 30% rule typically refers to budgeting guidance suggesting homeowners set aside roughly 30% extra on top of their estimated remodel cost for unexpected issues like plumbing surprises or structural repairs. Definitions vary by contractor and region, so confirm the specific buffer your remodeling team recommends for your project.
How Do You Survive Without a Kitchen During a Renovation?
Batch-cook and freeze meals before demolition starts, stock a mini-fridge with essentials, and keep a short takeout list for the nights nobody wants to cook. A predictable routine, morning coffee, a couple of reliable one-pot dinners, does more for morale than any single appliance purchase.
What Can You Use as a Temporary Kitchen Sink During a Renovation?
A laundry or utility sink is the best substitute if one’s available in your home. Without one, a two-basin system on a sturdy table, one basin for hot soapy wash water and one for clean rinse water, handles dishwashing reliably until your main sink is reconnected.
