
Remodeling guide
Winter Window Installation: Contractor Level Checklist for Homeowners

Yes, you can install or replace windows in winter, and in most cases it works out fine. It’s feasible when the opening is dry and clean, the crew flashes and seals it correctly, and everyone follows the manufacturer’s temperature limits for foam and sealant. Postpone only for active heavy precipitation, dangerous wind, or cold deep enough to block adhesive cure.
TL;DR:
- Properly managed winter window replacements can be completed successfully if installation conditions stay dry, and sealants are applied within manufacturer temperature limits.
- Shorter lead times and seasonal promotions in winter can save money, but verify what costs are covered and ensure the contractor follows safety and weather-triggered protocols.
- Installation must follow a detailed sequence, including measuring, removing old units, installing flashing, and sealing, with shortcuts at these steps causing future leaks or failures.
- Cold weather affects materials’ performance, requiring careful selection of foam and sealants based on temperature ratings, and delaying exterior caulking to ensure proper curing.
- Contractors should have documented weather policies, use safety practices with older homes, and provide clear, comprehensive estimates that outline procedures, weather conditions, and warranties.
Table of Contents
- Why Winter Can Be a Smart Time to Replace Windows
- What Winter Risks Should Homeowners Watch For?
- What Does a Winter Window Installation Sequence Look Like?
- Materials and Sealants: What Works in Cold Weather
- How to Choose an Installer for a Winter Window Job
- Timing, Lead Times, and Realistic Costs in Winter
- What a Contractor Actually Watches for During a Winter Install
- Get a Winter-Ready Window Estimate
- Sources
- FAQ
Why Winter Can Be a Smart Time to Replace Windows
Contractors get quieter in December through February, and that quiet works in your favor. Crews that are booked six weeks out in June often have next-week openings in January, which means less waiting and more scheduling flexibility for you.
Pricing can move too. Some companies offer seasonal promotions to fill the gap between fall rush and spring rush, but read the fine print. A discount on the unit price doesn’t always cover disposal fees, permit costs, or trim work, so ask what the quoted number actually includes before you sign anything.
There’s also a comfort argument that has nothing to do with saving money. A window with failed seals or a cracked pane is a bigger problem in January than in July, and waiting until spring just means months of drafts, higher heating bills, and possibly frozen condensation on the glass.
- Off-season scheduling often means shorter lead times to get on the calendar
- Seasonal promotions can lower costs, but verify what’s actually included
- A failing window is a safety and comfort issue that doesn’t improve by waiting
- New windows chosen by climate-zone performance criteria contribute to a tighter building envelope alongside insulation and air sealing
Replacing old single-pane or double-pane units can meaningfully improve comfort near the glass and cut energy use, though the Department of Energy notes actual savings depend heavily on your climate and the rest of your home’s envelope. Windows are one part of a bigger system, not a standalone fix.
What Winter Risks Should Homeowners Watch For?
Cold weather doesn’t make window installation impossible, but it does raise the stakes on execution. Frozen or wet framing won’t bond with sealant the way dry lumber does, and a crew rushing to beat falling snow can leave gaps in the flashing that show up as leaks the following spring.
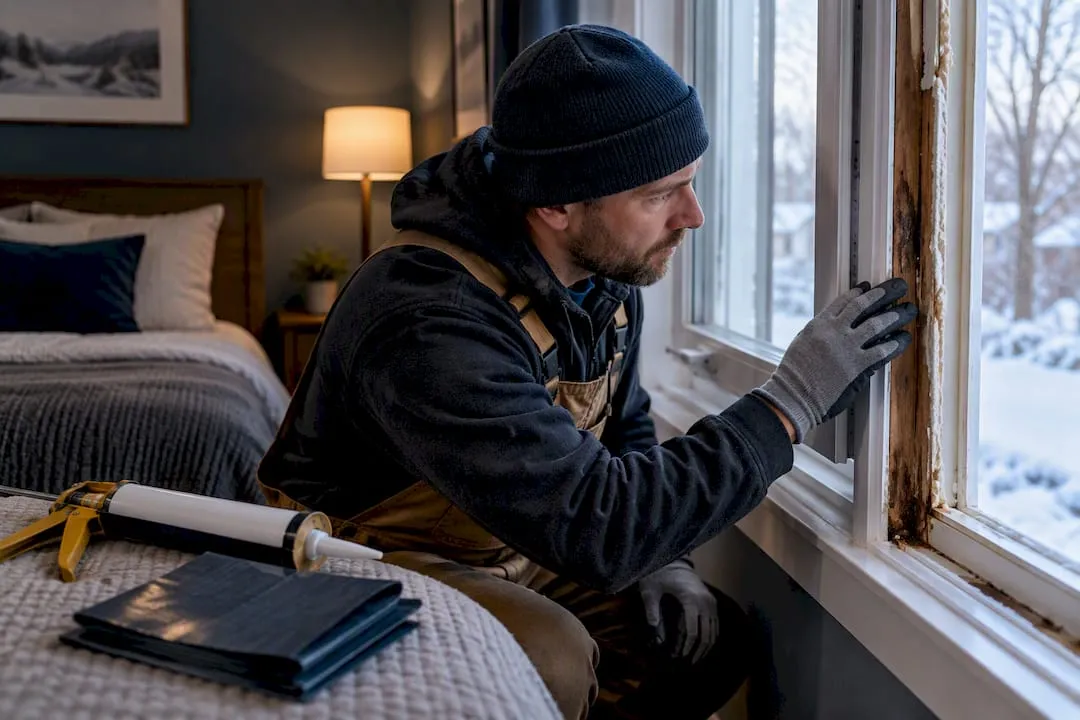
The core problem is continuity. Building science research emphasizes that a window only performs as well as the sloped sill, pan flashing, and air seal around it work together as one system. Snow melt refreezing in a partially sealed opening, or a sudden gust lifting a temporary cover, can break that continuity before it’s even finished.
Reputable installers use clear go or no-go triggers instead of guessing:
- Active heavy snow or rain that keeps the opening from staying dry during work
- Sustained winds strong enough to threaten safety or blow debris into an open wall cavity
- Temperatures sustained below the sealant or foam manufacturer’s minimum application threshold
- Substrate that’s frozen, frosted, or visibly wet and can’t be dried before flashing goes on
Your contract should spell out what happens when one of these triggers hits. Ask for written terms covering temporary tarps or plywood over an open wall, a portable heated enclosure if the crew needs one, and a clear rescheduling policy that doesn’t leave your house exposed overnight.
If your home was built before 1978, there’s one more nonnegotiable: lead-safe work practices. Federal rules require contractors to follow EPA RRP protocols when disturbing painted surfaces around old window openings, and that requirement doesn’t pause for cold weather.
Pro Tip: Ask your contractor to text you a photo of the weather forecast they’re using to make the go/no-go call on install day. It takes them thirty seconds and gives you a paper trail if a dispute ever comes up.
What Does a Winter Window Installation Sequence Look Like?
A professional crew doesn’t just yank out the old unit and slot in the new one. The Department of Energy’s installation guidance lays out a sequence built to protect the opening at every stage, and knowing it helps you evaluate whether a bid is thorough or rushed.
- Protect the interior. Crews lay down floor covering, remove or mask nearby trim, and clear the work area before touching the old window.
- Measure the rough opening. This confirms the replacement unit fits precisely, which matters more in winter since a sloppy fit means more exposed gap time.
- Remove the old unit and inspect the frame. Rotted sill or jamb material gets cut out and replaced now, never left for later.
- Install sloped pan flashing or a liquid-applied pan. This is the detail that determines whether water drains out or pools inside the wall for the next decade.
- Dry-fit the new window. The crew checks level, plumb, and square before committing to fasteners.
- Shim and fasten to manufacturer spec. Over-driving screws or skipping shims is a common shortcut that shows up later as a window that won’t close right.
- Air-seal the interior gap with backer rod and low-expansion spray foam, then finish exterior flashing and caulk once conditions allow it to cure properly.
- Test and document. Every sash gets opened, closed, and locked before the crew leaves, and the installer verifies weathertightness around the whole perimeter.
Skipping step four or rushing step seven are the two most common winter shortcuts, and they’re also the two most likely to cause a callback in March.
Materials and Sealants: What Works in Cold Weather
Not every foam and caulk on the shelf performs the same in freezing temperatures, and this is where a lot of winter installs go wrong. Low-expansion spray foam paired with backer rod is generally the better choice at jamb gaps in cold weather, since high-expansion foam can bow a frame or overfill a cavity before it’s fully cured in low temperatures.
Sealants aren’t interchangeable either. Silicone, polyurethane, and hybrid formulas each carry their own minimum application temperature, and going below it risks a bond that looks fine on install day and fails within a season. Industry guidance on caulks and sealants recommends checking manufacturer specs and running a quick field adhesion test before committing to a full perimeter.
- Confirm the foam and caulk brands match the manufacturer’s cold-weather compatibility list
- Ask whether liquid-applied flashing or formable membrane is being used at the sill, since some products cure poorly below certain temperatures
- Expect exterior caulk to sometimes get staged for a warmer day rather than applied immediately in a hard freeze
Pro Tip: A crew that delays the final exterior caulk line until a 40-degree afternoon isn’t cutting corners. Waiting for cure conditions is often the more careful move, as long as they document it and cover the gap temporarily.
How to Choose an Installer for a Winter Window Job
The estimate itself tells you a lot about how seriously a contractor takes winter conditions. A vague one-page quote with a price and nothing else is a warning sign; a thorough one spells out exactly how bad weather gets handled before it happens.
- Require written go/no-go weather criteria and a rescheduling policy, not a verbal promise
- Ask what temporary protection they use for an opened wall if weather turns mid-project
- Confirm they’ll show you NFRC and ENERGY STAR labels on the actual units delivered, not just the ones quoted
- Ask directly whether the crew follows EPA RRP lead-safe practices if your home predates 1978
- Verify current license and insurance, and get it in writing rather than taking their word for it
- Make sure the contract defines acceptance criteria: every sash opens and locks smoothly, no visible gaps, no drafts at the perimeter
- Nail down who pays for repairs if rot or structural damage is found once the old unit comes out
A contractor who welcomes these questions is usually the one who already builds these steps into their process.
Timing, Lead Times, and Realistic Costs in Winter
Custom windows don’t manufacture any faster because it’s cold outside. Lead times for made-to-order units often run several weeks regardless of season, so ordering early still matters even if installation itself can happen quickly once the windows arrive.
That seasonal discount you saw advertised deserves a second look, too. Some promotions only apply to the window unit and exclude labor, flashing materials, or disposal of the old frame, so ask for a full breakdown before comparing it to a spring quote.
Emergency replacement, like a shattered pane in January, typically costs more than a planned project because there’s no time to shop lead times or wait for a slower week. If you can plan ahead, you’ll usually save.
Before install day, walk through this short checklist:
- Move furniture and window coverings out of the work zone
- Clear a path for the crew to move materials in and out
- Identify a heat source you can use nearby if the wall stays open briefly
- Confirm the crew’s weather window one more time the day before
What a Contractor Actually Watches for During a Winter Install
Experienced crews limit how long an opening stays exposed, protect flooring and furniture before anything gets removed, and test every sash before calling the job done. Hidden problems, like rotted sill material found once the old frame comes out, get documented with photos and explained to the homeowner rather than quietly patched over.
Strict sequencing and manufacturer-spec materials aren’t extra steps tacked on for winter. They’re the difference between a window that performs for twenty years and one that needs a callback by April.
— Vlad
Get a Winter-Ready Window Estimate
If you’re weighing whether to move forward now or wait for spring, the honest answer is that a properly managed winter install carries the same long-term result as a summer one, minus the wait. A professional remodeling company handles window installation with licensed, insured crews who plan around weather instead of working around it, using documented go/no-go criteria, lead-safe practices on older homes, and materials chosen for actual cold-weather performance rather than convenience.

When you request an estimate, expect a clear breakdown: the NFRC and ENERGY STAR labels for the units being installed, the specific flashing method planned for your opening, the weather conditions that would pause work, and what the warranty and cleanup process look like once the job wraps. No pressure, no vague pricing, just a plan you can actually read before you commit. If a window in your home is drafty, fogged, or overdue for replacement, reach out to Solution Team Remodeling’s window installation page to schedule a consultation, or browse the full range of remodeling services if you’re planning a bigger winter project around it.
Sources
- High Performing Windows or Storm Windows | ENERGY STAR
- BSI-085: Windows can be a pain — Continuous insulation and punched openings (Building Science)
- EPA: Renovation, Repair and Painting (RRP) Program
FAQ
Is It Okay to Have Windows Installed in Winter?
Yes, as long as the crew follows a correct sequence, protects the opening from moisture, and uses sealants rated for the temperature that day. The Department of Energy’s installation guidance treats winter installation as standard practice when these conditions are met, not as a special exception.
What Is the Best Time of Year to Install Windows?
There’s no single best season, since a well-managed installation works year-round when conditions cooperate. Winter often brings shorter contractor lead times and possible seasonal pricing, while spring and fall offer wider temperature margins for sealant cure, so the better question is whether your contractor has a documented weather plan rather than which month it is.
How Cold Is Too Cold to Leave Windows Open Overnight?
There’s no single safe number since it depends on the sealant and foam products the crew is using and each manufacturer’s minimum cure temperature. A responsible crew won’t leave an opening exposed overnight in freezing conditions without temporary protection like a tarp or temporary panel in place.
Will Replacing Windows Make a House Warmer?
Often yes, especially if you’re replacing old single-pane or double-pane units, since new windows chosen for your climate zone reduce drafts and heat loss at the glass and frame. Actual savings vary by home and climate; ENERGY STAR’s modeling shows the size of that benefit differs by region, and windows work best as part of a broader envelope upgrade rather than a standalone fix.
Does Solutionteamremodeling Handle Window Installation in Winter?
Yes, Solutionteamremodeling installs windows year-round, including winter months, using licensed crews who follow documented weather and safety procedures. Pricing depends on project scope, so current details are available by requesting an estimate through the window installation service page.
